When I first touched the mechanical keyboard, I felt that the customization was very fun and I fell into it unconsciously. I couldn't help but pick up my hand at the colorful keycaps.
So start to engage in your own keyboard
Quickly thought again and again40% and 60%, select 60% of the keyboard, 40% of the keys need less programming, because I do not want to program and do not want to learn programming (too lazy ...), of course, the simpler the better.
Wired and wireless, must be wireless. But Bluetooth can't satisfy me, the battery life is short (it is said that there is a keyboard that is charged for 2 days), and the Bluetooth response speed is slow. So finally choose DIY
Arrangement, because it is to play for myself, so it's weird to sort it out. In essence, it is the GH60 that has pushed in four key keys: the arrow keys and Del.
The last is to fly the Logitech K230 to each key axis on the OK.
Logitech's K230 keyboard is very cheap, the European version without a receiver is only about 30, the matrix and domestic are the same.
Flying line + Logitech Plus. Distribution In order to meet the daily office needs, forced the addition of the arrow keys and DEL key.
They are called "spiritual flight lines." That's right! The flying line is very painful. At that time, in order to locate the satellite axis, an old pcb board was found to be punched and positioned, but the location of the punching hole was inaccurate. 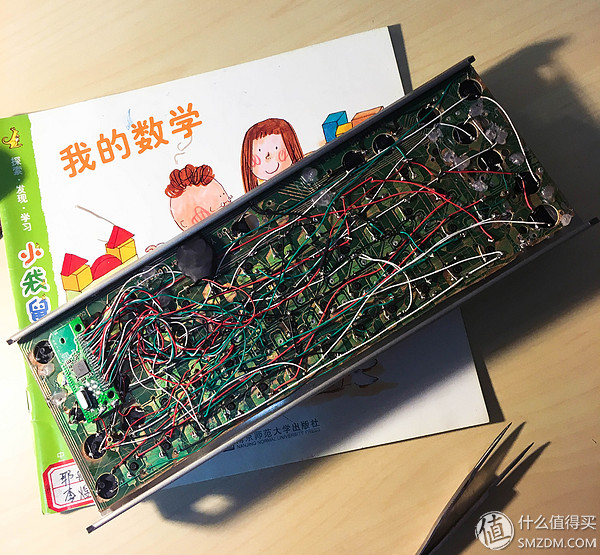
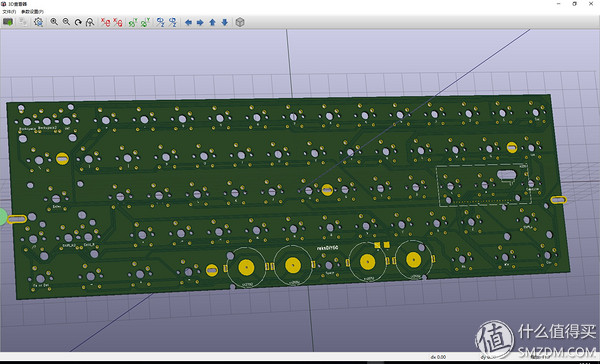
After choosing a piece of software, kicad feels good and the way of operation is used. Although he has never drawn a pcb drawing, he has not learned electrical knowledge. But looking at the online tutorials, plus the fact that you used to learn 3D before (a little self-confidence that any graphics software can easily get started), so get started very quickly. 3 days from zero to drawings released.
Kicad can be downloaded directly from the official website. The installation file is very small. The most important is open source software, eliminating the need to find hacks everywhere
PCB design specificationsPower supply can be installed 4 cr2032, it is estimated that can last for 8-12 months
Support GH60, POKER2 shell (I currently use plastic and a metal minimalist shell)
Support cherry MX axis
Listed below
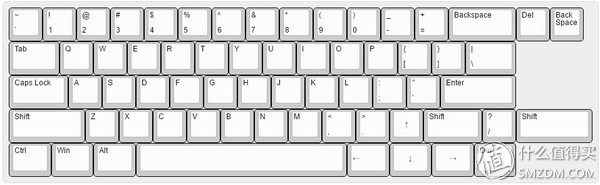
Right shift and? The reverse was because the positioning board that was previously purchased decided this time. If there is a next time, I will let pcb support more allocation.
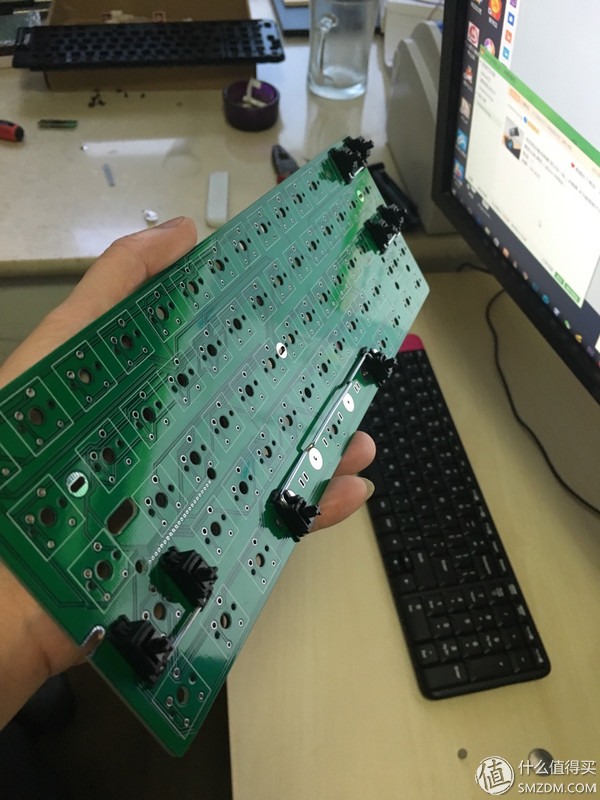
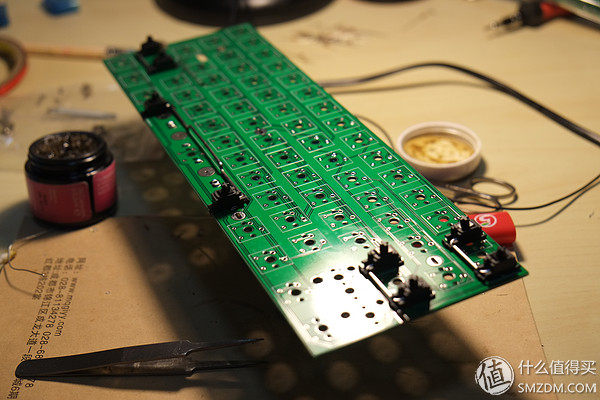
The well-made pcb board is of good quality. When it was submitted to the factory, it was very irresolute and it was the most common process. The actual production was the same as the one I painted. There was no problem with the test. First try two keyboards! (Amount, there are a few pcb left)
Install pcb board K230 master installation
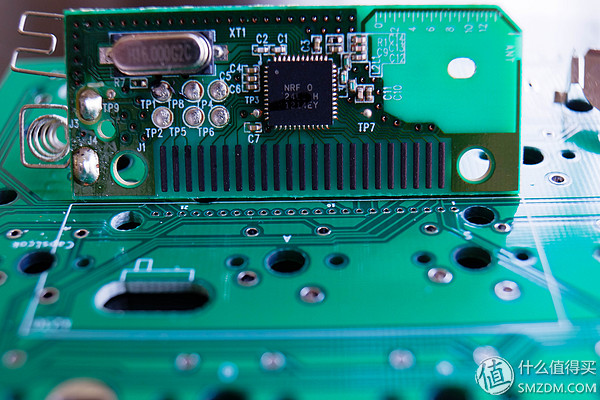
The white printed silk on the pcb board is marked with 1 10 21 numbers, 1-9 21-23 is the vertical row of the K230 matrix 10-20 is the horizontal row
Screw holes and crystals are perfectly positioned
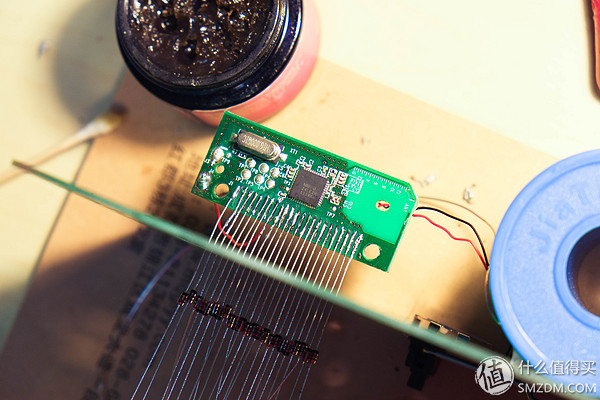
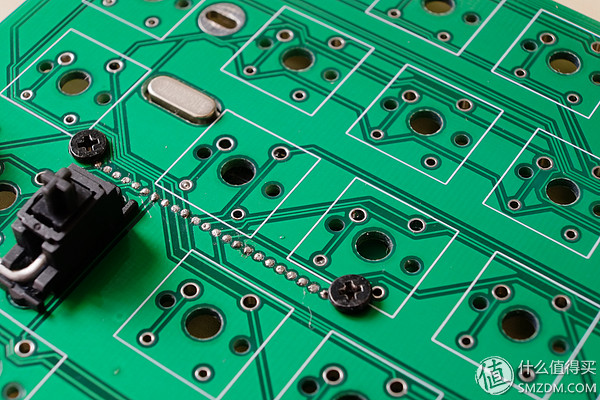
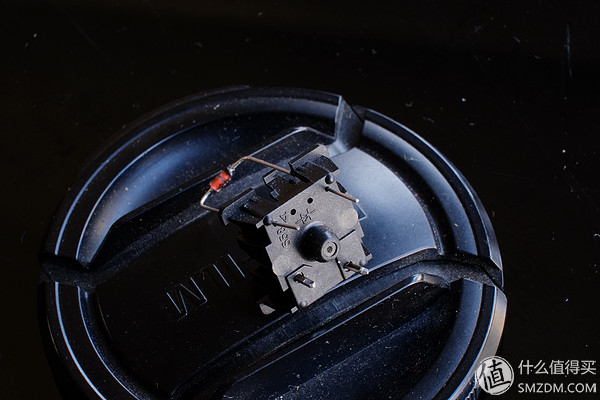
At the beginning, I used diodes to insert 23 solder holes and solder them to the K230 master. Then I bent the pins and inserted them into the pcb.
This will not increase the overall thickness of pcb, and there is no trouble with flying lines.
However, the hole was a little bit small, which caused the k230 main control finger to be broken when the pin was bent. Therefore, the K230 main control can only be welded with a paint line or other wire.
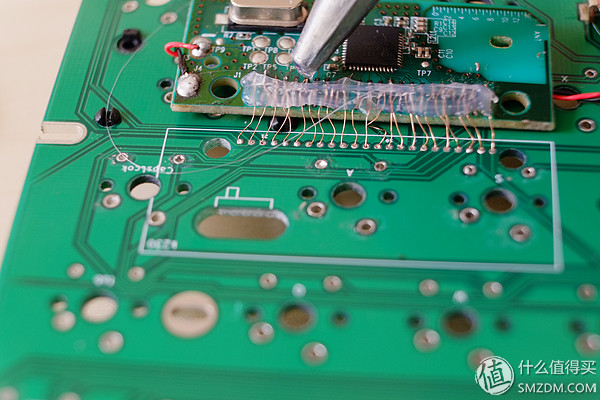
Without a gold finger, there are several solder joints that are very small and have to be fixed with hot glue. If the wire is detached, it can only be replaced with a new K230.
Good screw on the back.
The next time you draw a pcb, you can use the pins to insert this method by increasing the 23 holes.
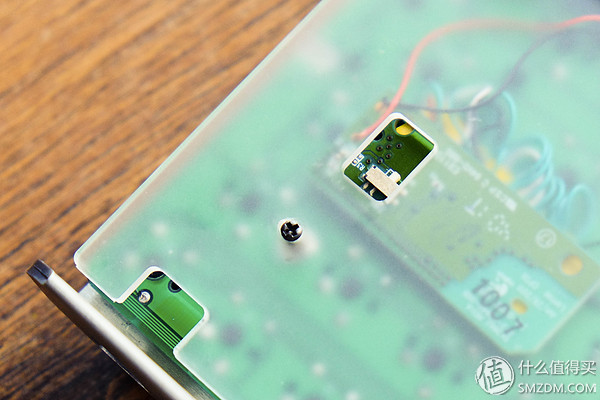
Install cr2032 battery holder
Cr2032 battery holder I chose the kind of patch, very thin
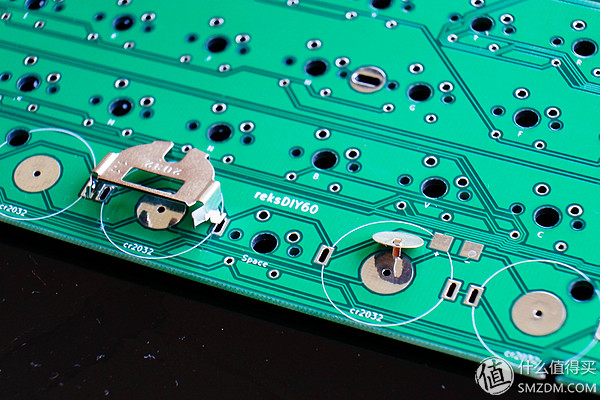
The left side is the positive side of the electromagnetic seat, and the right side small round is the negative base. Later found negative base does not need to install. When the battery card goes in, the negative electrode automatically contacts the negative pad of the PCB board.
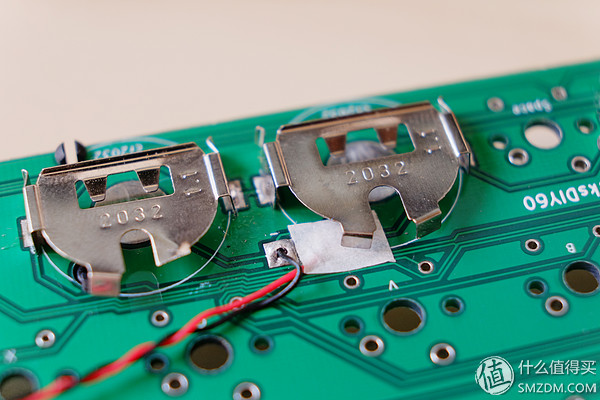
In the case of positive and negative links with the master, it is necessary to paste an insulating tape on the pcb board. Because when designing the pcb diagram, it was not noticed that the negative electrode would touch here when the battery was inserted.
Install the key shaft and satellite shaft
Each key axis needs to install a diode to prevent conflicts, and then think about what is actually not needed. You can try changing the LED next time.
Diode black line is the mark on the negative axis of the corresponding key, insert it on it.
The installation of the satellite shaft is very simple and it can be buckled directly. (The cherry's satellite axis does not seem to match the positioning plate of the GH60)
Shell I use the plastic shell of GH60, about 50 yuan
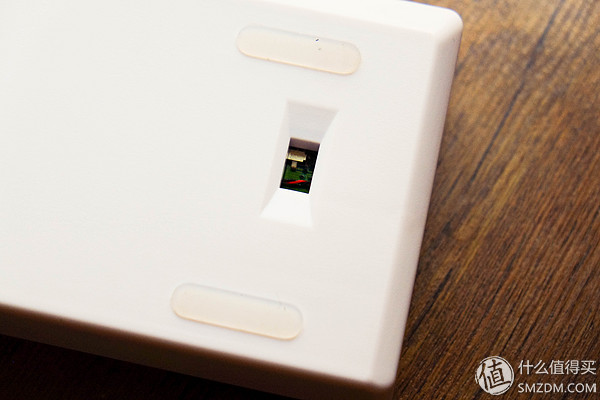
After the shell is installed, the switch of the K230 main control just corresponds to the bottom hole of the GH60 series shell, which is convenient for switching the keyboard. Uber is very energy-efficient, and I basically have no connection.
Logitech official website installed drive, you will automatically recognize the k230 keyboard.
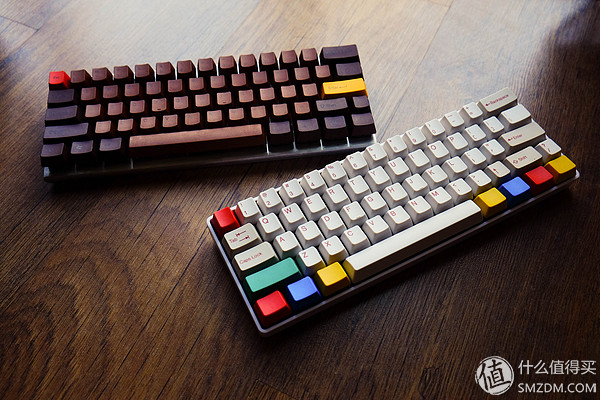
Keycaps and key shafts
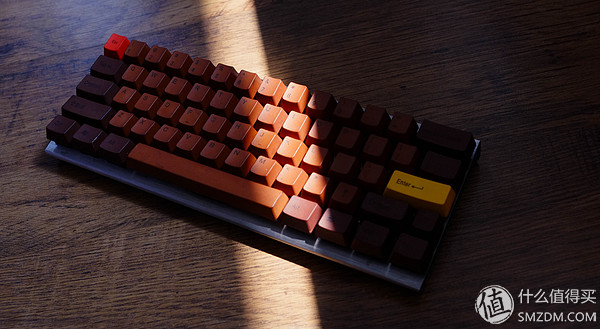
This brown keycap is dyed for the first time. The process is poor!
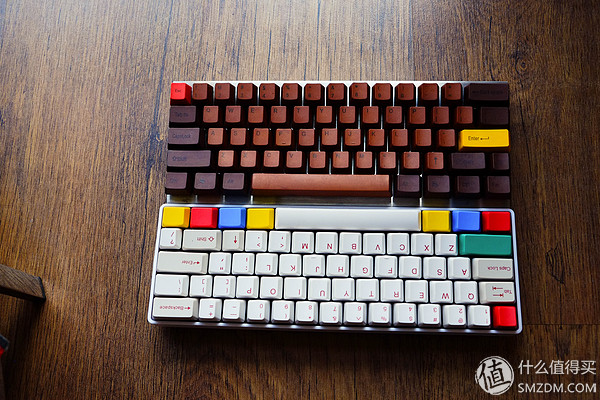
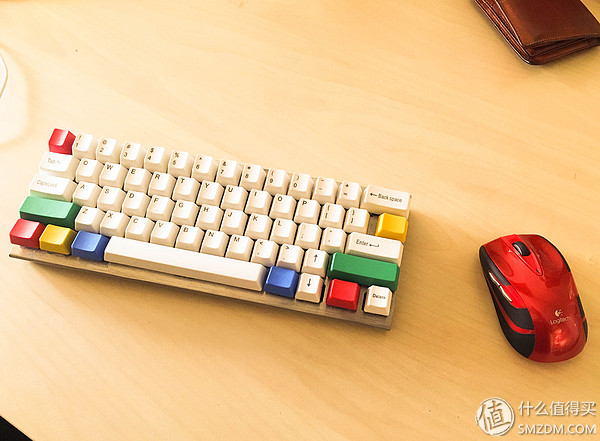
This is the finished Taihao gray red keycap joined the RGBY color
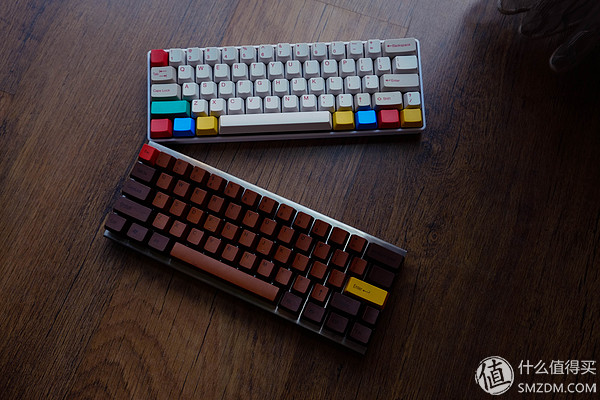
White keyboard for friends, brown for their own use. (Coffee stain is too bad to send it out)
Another one, as a novice for the first time there are many places in the DIY keyboard, and laughed. At the same time, I also thank you for sharing the great gods of U-Tech. I don't have the courage DIY keyboard without your posts.
END