HP's pavilion wave has been bought for more than half a year, (in fact, have not used several times...) Now look at the HP online store only with the highest model, middle and low allocation have disappeared, what is the situation?
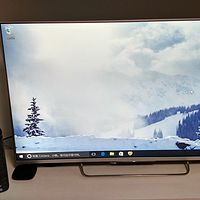
The original out of the box sun single link:
 HP HP Pavilion Wave out of the box to Xiaobian to ah ~~~~~~~~~~~~~~~ A few years ago, the home service lenovoT60 almost 10 years of problems, then decided to use another computer. The notebook has been used for a long time, the screen still feels small, and there is no need for the home to move, so this time prepare to use another desktop. Specific needs Well, do not play games, mainly on the Internet, write and write word, excel, see movies and the like, another home on a desk lakeysky| Likes 15 Comments 76 Collections 63 View Details
 Now the desktop: (The original wireless mouse is not easy to use, has been using the home idle mouse.)
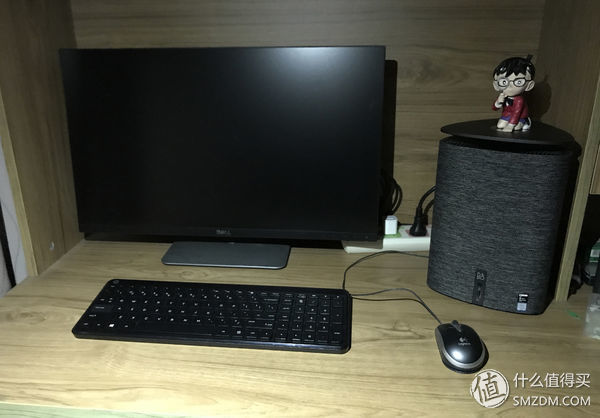
Incidentally, the huge power adapter bought a small bracket and was fixed under the table.

At that time, it was a medium match. There was only a 1T mechanical hard disk. At night, sometimes the hard disk still had a sound. It was recently slightly empty. Would you like to upgrade to another level, change the SSD, and expand the memory?
Delayed dismantling for a long time. . . The original online did not disassemble the tutorial, now search again, actually found a few articles
Since there are tutorials, take a look at it
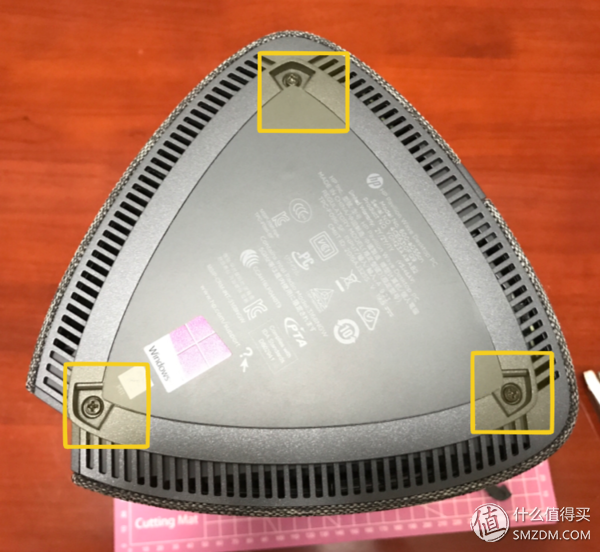
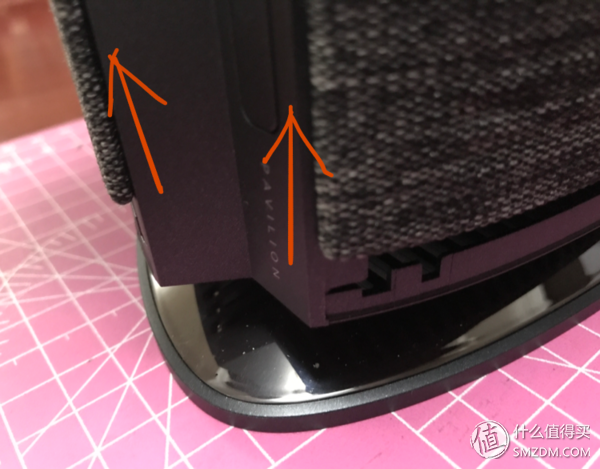
The host is turned upside down and the bottom 3 anti-slip mats can be kicked down:
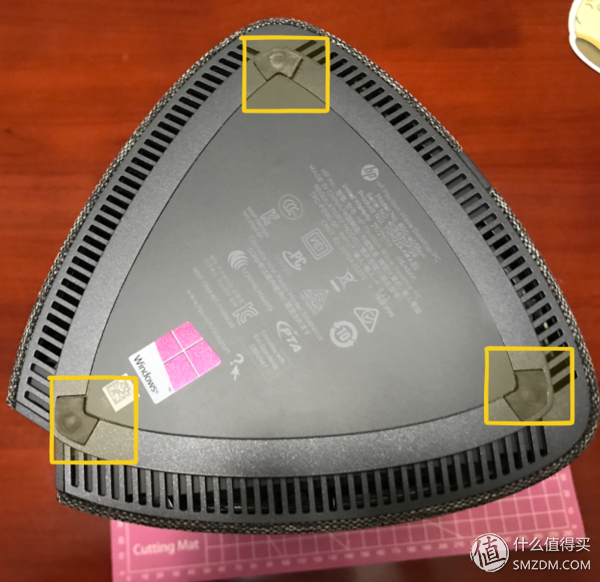
Pay attention to the anti-slip stickers on the anti-slip mat near the interface area
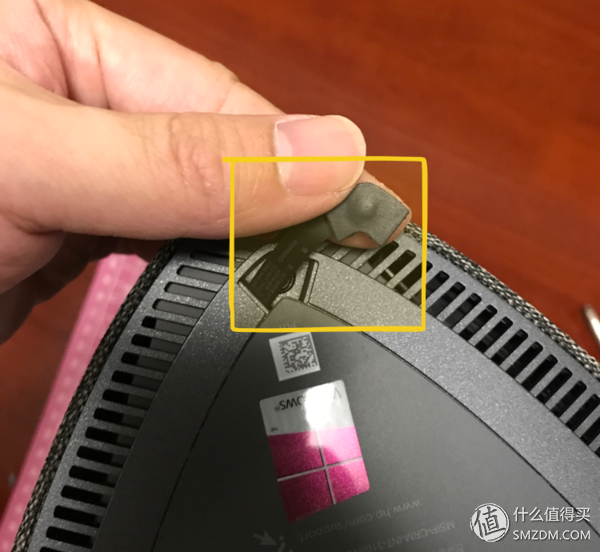
Remove the 3 screws under the anti-slip mat, you can open the bottom cover
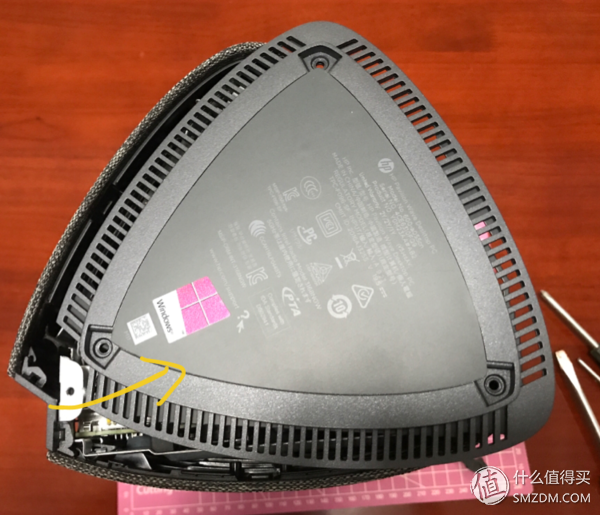
Inside is the hard disk, fan, motherboard, divided into three large blocks, surrounded the middle of the speaker
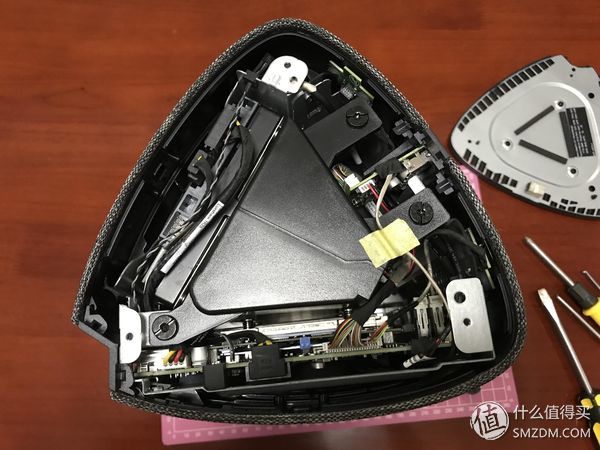
Then start demolition:
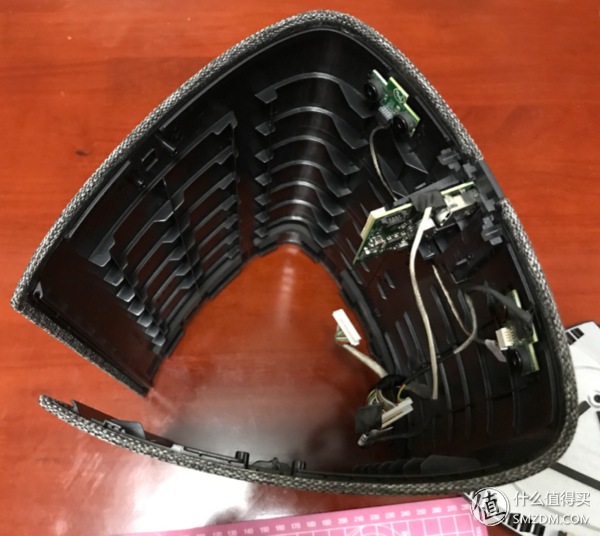
First pull out the 4 interface cables connecting the shell and the motherboard, two on the small PCB of the shell and two on the motherboard:
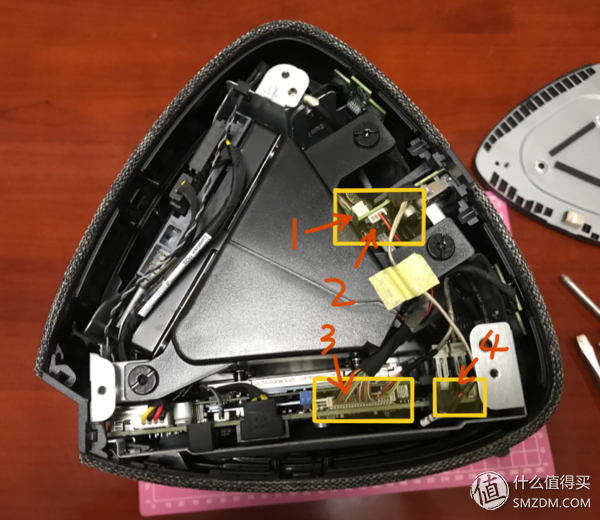
Then the shell can be removed. In the case of an inverted hand, the shell is gently pushed upwards from the edge of the interface area, and the entire shell can be slowly removed. Several interface cables have just been removed from the housing. Take care when removing the housing.
Removed shell:
Remove the host after the shell: (The red is the hard disk, the yellow is the fan, the blue is the motherboard)
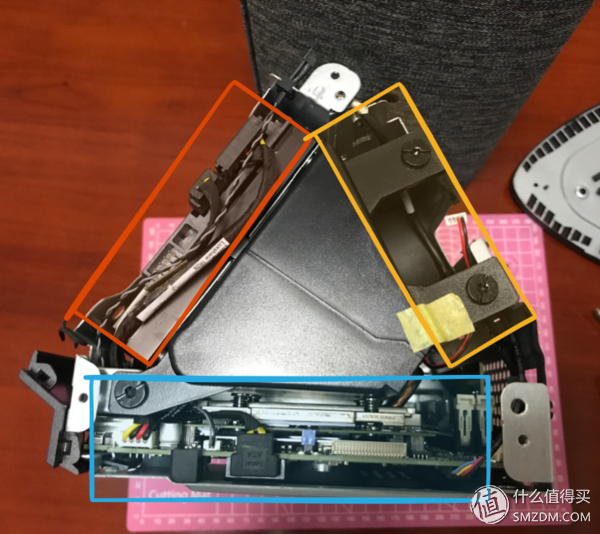
After the shell is removed, you can see the three sides of the situation.
The left side of the fan bracket is the location of the memory slot and can be separated. After removing a fixing screw from the top of the stand (red position in the figure below), push the small metal plate on the left (blue position in the figure below) to see the memory slot.
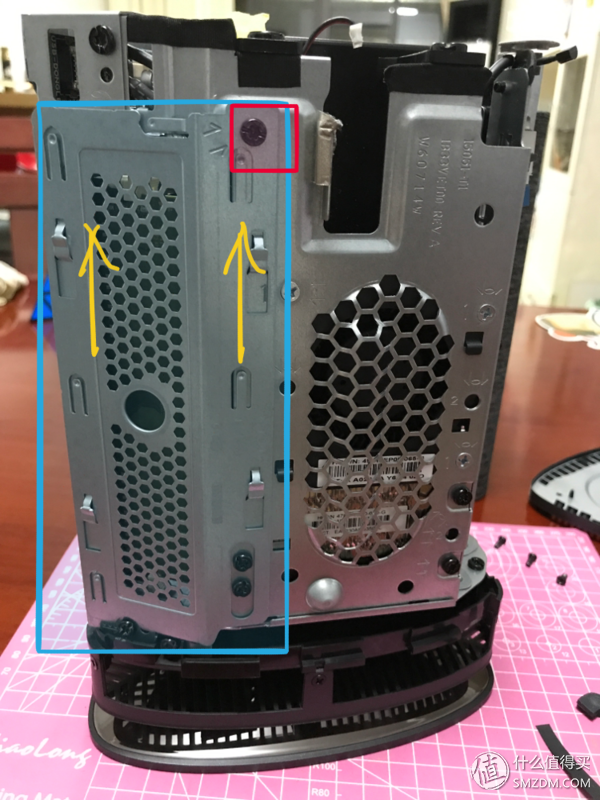
After opening it looks like:
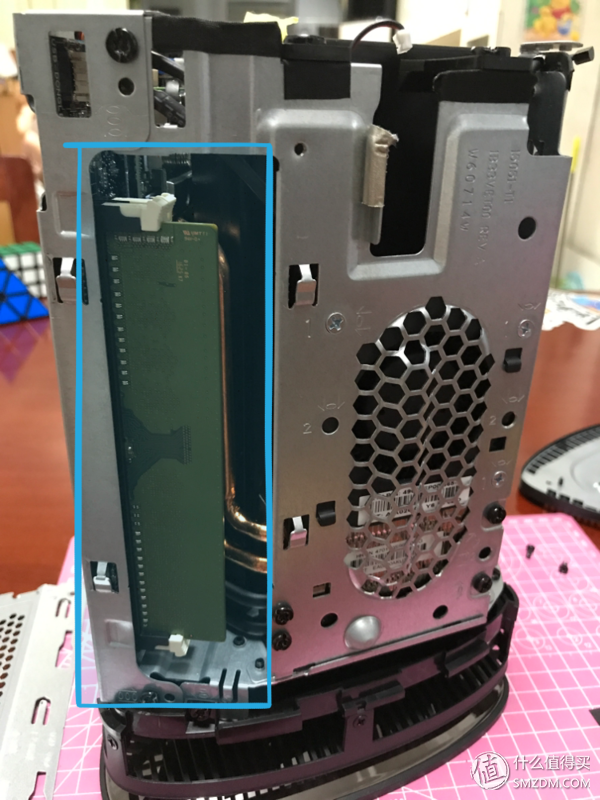
Remove the memory and see:
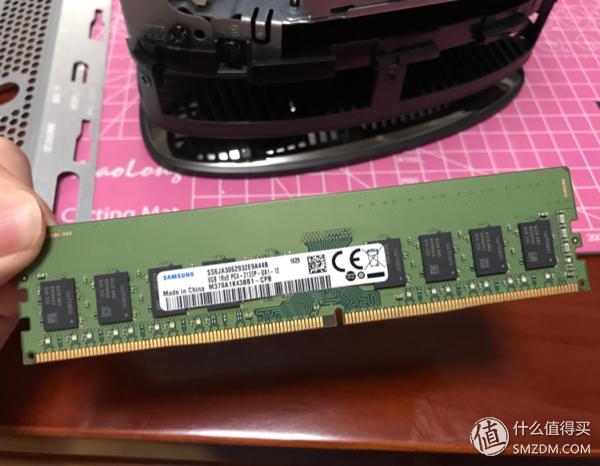
Two slots, memory can expand a group of dual channel ~ ~
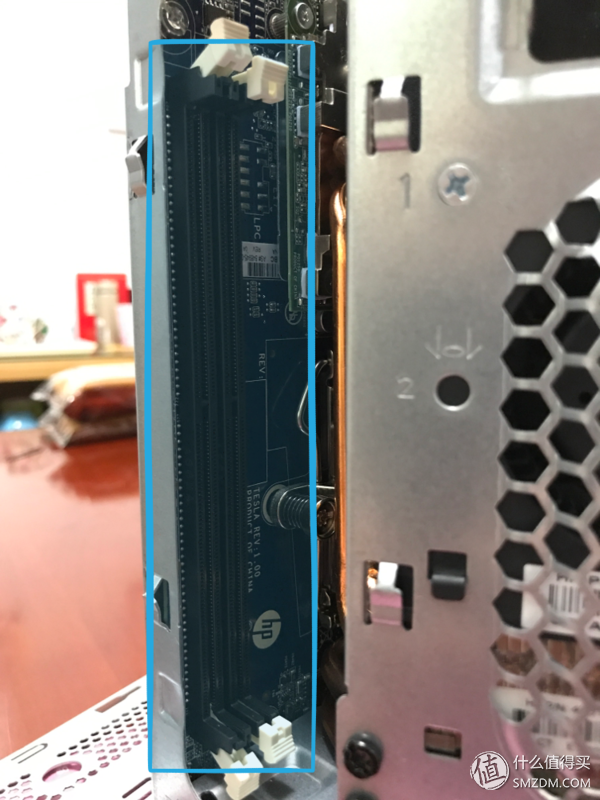
Conclusion 1, memory expansion is relatively easy
Then look at the location of the hard disk, there are 4 screws fixed and removed
Unplug the data cable of the hard disk, you can pull out the hard disk from above,
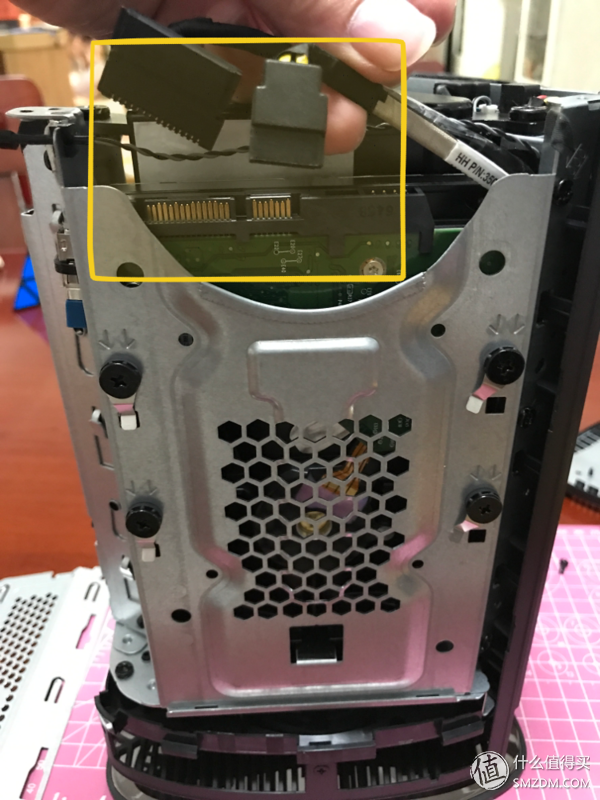
1T desktop mechanical hard drive, big. . .
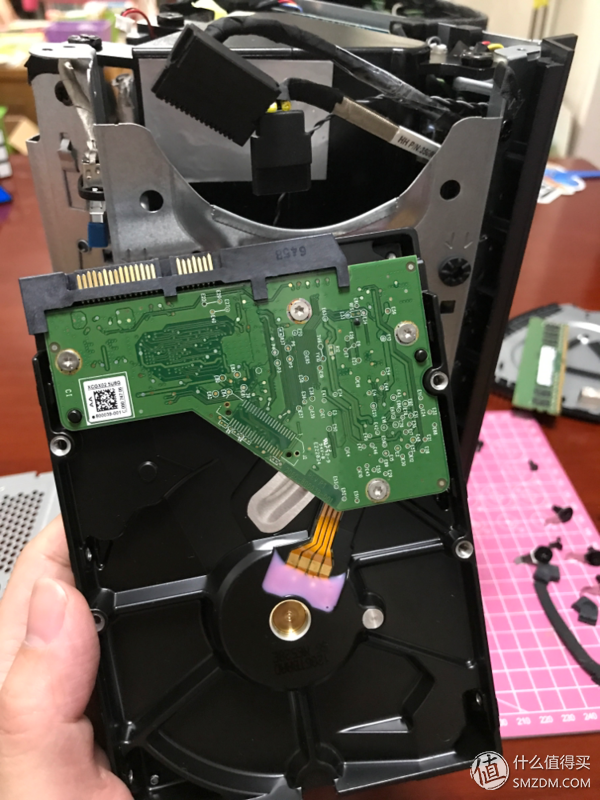
Here you can change the SSD, but it is estimated that you need to add a fixed bracket, after all, the hard disk size is not the same, put it into consideration need to be fixed. . .
Checked on the Internet, there seems to be no way to put two hard drives, such as an SSD a notebook mechanical hard drive, although the space is large enough, but the motherboard does not seem to have redundant interfaces. . .
Conclusion 2. The original mechanical hard disk for SSD is not too difficult
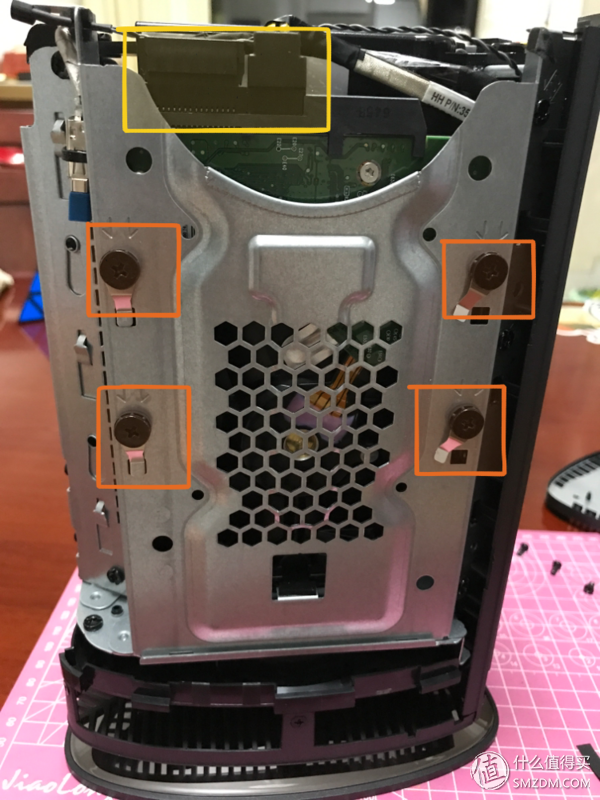
Lastly, it is the motherboard location. On the Internet, there is a reserved M.2 interface on the back of the motherboard (probably the blue position in the figure below). The high-end host comes with an SSD plugged in here. . . However, if you want to add an M.2 SSD to this location, you must remove the motherboard bracket. Need to first remove the top shell of the host, remove the speaker, remove the hard disk bracket, remove all the things that can be removed before you can open the motherboard bracket. . . Think about it, think first. . .

Looks like the following wireless network card has a gap as if it can be directly changed, why not open a mouth for the M.2 interface?
Conclusion 3. Expanding M.2 SSDs is difficult. . . .
Now you can think of the fastest way. Can you cut a hole directly on the motherboard bracket?
KNL5-63 Residual Current Circuit Breaker
KNL5-63 Moulded Case Circuit Breaker is MCCB , How to select good Molded Case Circuit Breaker suppliers? Korlen electric is your first choice. All moulded Case Circuit Breakers pass the CE.CB.SEMKO.SIRIM etc. Certificates.
Moulded Case Circuit Breaker /MCCB can be used to distribute electric power and protect power equipment against overload and short-current, and can change the circuit and start motor infrequently. The application of Moulded Case Circuit Breaker /MCCB is industrial.
Korlen electric also provide Miniature Circuit Breaker /MCB. Residual Current Circuit Breaker /RCCB. RCBO. Led light and so on .
KNL5-63 Molded Case Circuit Breaker,Small Size Molded Case Circuit Breaker,Electrical Molded Case Circuit Breaker,Automatic Molded Case Circuit Breaker
Wenzhou Korlen Electric Appliances Co., Ltd. , https://www.zjaccontactor.com