Starting from the power supply, the original drum of the main filter capacitor was removed and replaced with second-hand Ina and "Black Diamond" 12000μF / 63V, the capacity doubled to 48000μF. There is a saying that after the filter capacitor reaches 40,000 μF, then increasing the capacity will not have much effect on the improvement of sound quality, so it does not increase the capacity for the time being, adding an iron plate between the power supply part and the rear stage, so that the two live in the same room In order to reduce the magnetic interference of the transformer on the electric rookie motor of the rear stage. Install channel steel on both sides of the iron plate, install four "black diamond" electrolytic capacitors, connect them with wires two by two and lead them to the welding holes of the main filter electrolytic capacitors, and add 2.2μF and 0.1μF / MKP capacitors.
The positive and negative 12V, 5v filter electrolytic capacitors are marked with 2200μF on the circuit board. This machine only uses 1000μF, which is probably the product of manufacturers cutting corners. These three electrolytic capacitors use Sanyo 6800μF / 25V. The position is just right to install. The three 47μF / 25V electrolytic capacitors filtered after voltage stabilization are replaced with manonlOOμF / 25V electrolytic capacitors which are disassembled. All the above electrolytic capacitors are added with 0.22μF Weimar capacitors. 7812, 7912, 7805 were originally plastic sealed, changed to gold sealed and insulated. It is better to change the three-terminal voltage regulator to a low internal resistance adjustable type, but because the position is too narrow, it is inconvenient to add peripheral components. After the rectifier diode 1N4007 was retained for a period of time, it was also changed to 1N5408 with a current of 3A. Due to the use of a filter socket, a small capacitor with no noise suppression is added to the diode. The heat sink of the voltage stabilizer is too simple, only one aluminum sheet, thickened and heightened with seven heat sinks, it looks strange, but the heat dissipation effect is good. After this, the bass has improved.
After tasting the sweetness, the next stage is to play front and rear. I originally planned to change the coupling capacitor first. Considering that the decoupling capacitor and bypass capacitor also have a greater impact on the sound, it is easy to change the picture. In the end, only the ceramic capacitors and the two 47μF / 100V electrolytic capacitors in the latter stage were not replaced.
Except for the Israeli capacitors used for CD channels, the front-stage input isolation uses 1OμF electrolytic capacitors. The pre-stage lOμF electrolytic capacitors are all Sanyo os solid capacitors except input capacitors. The characteristics of Sanyo solid electrolytic capacitors are high sound density, high and thin treble and high resolution, low equivalent series resistance, high ripple resistance, trustworthy, and not high price. It is worth noting that there are fake Sanyo solid capacitors on the market. The end of the pin that distinguishes the genuine product is chrome-plated, and the section near the capacitor is dark copper. The dark copper color of the fake is painted, and generally also seals the sealed epoxy resin.
Six 22 LF / 25V electrolytic capacitors were replaced with NICHICON 33μF / 25V electrodeless capacitors. 6 decoupling capacitors are replaced with 100μF / 35V Sanyo electrolytic capacitors, and two 47μF / 2SV electrolytic capacitors are replaced with tantalum capacitors. F.220μF / 25V electrolytic capacitors are selected with the same specifications. The five-channel input capacitor of the rear stage is replaced with a 4.7μF capacitor, two 47μF electrolytic capacitors are replaced with Sanyo Os solid capacitors, and five 220μF / 16V electrolytic capacitors are replaced with 220μF / 25V Golden Prince electrodeless capacitors. The unit price of this capacitor is close to that of this unit. Toshiba's output is a bit wasteful, but it is not easy to buy supplemental capacitors. The golden prince capacitor is a bit exaggerated, at least it looks comfortable, and the psychological hints are good. The five green capacitors with a capacity of 473 should be CBB in terms of volume and shape. However, because it is not easy to disassemble and install in the later stage, it is better to replace the wrong one without leaving the trouble. Replace it with Weimar MKP, replace the volume with the replaced capacitor, Polyester capacitor on the function adjustment board. The polyester capacitors in the front and rear stages and the electrolytic capacitors of 1μ are replaced with second-hand and new polypropylene capacitors. If you want to reduce the cost of motorcycles, the electrolytic and polyester capacitors around Dolby decoding and karaoke chips will not be replaced. A predecessor of a motorcycle suggested that after replacing all polyester, monolithic, porcelain and polar electrolytic capacitors with a capacitance of 0.1 μF to 2.2 μF with metalized polypropylene capacitors, the sound is clear and sweet.
The seven op amps in the previous stage are 4558. Because the manufacturers have precedents to reduce the capacity of the capacitors, and the op amp on the Hushan AVK200 circuit diagram is 5532, it is suspected that the manufacturers also charge the op amp secondarily. Take a look at the integrated block removed, it really used 5532. At the time of purchase, the upgraded model ACD3000 with DTS decoding will be launched soon, probably because manufacturers have to cut production costs in order to sell off the old model. But .5532 is already cheap, how much can this move reduce the cost? The user loses a lot. There are two 562 capacitors in the front stage that are not installed, numbered 2C58, 2C65. Somehow. Choose OPA2604 as the replacement for the 4558 dual op amp. Buy two second-hand ones first, originally intended to be used on the CD channel, but like waiting for rookies, not only have they reached the age of presbyopia, but also did not enter the kindergarten to receive the training to find the maze, take one The circuit board was mistaken for a labyrinth, and it seemed ambiguous. It is said that football should be started from the doll, and it seems that the popularization of electronic knowledge is also the same. Because it is not sure to take one is a CD output op amp. Fortunately, the sound quality improved obviously. Chengsheng mail-order 5 pieces of new product 2604, the price of the new product is the same as the second-hand price, but the second-hand sound quality is slightly better. A total of 6 2604 were replaced in the previous stage. Only one 4558 was replaced with 5532. Next to the karaoke board. The 4558 next to the CD signal balance knob is also replaced with 2604, although it is not clear whether it is used to balance the left and right channels. After this move, the treble was crisp, dynamic, and the analytical power, sense of positioning, and sense of density were significantly improved.
Most people rarely wear fuses. However, the fuse acts as a bottleneck in the stream and acts as a current limit. Some people abandoned the fuse and used it directly. Although the sound was bold and powerful, it was rough and more than delicate. It is said that with a fuse of nearly 300 yuan, the sound can be improved on the 30,000 yuan expansion. Using the mousse method of veteran audiophiles in Guangzhou, MITO.22μF / 600V capacitors were connected across the fuse, which cost a hundred yuan which is increasingly optimistic about the market. At the same time, replace the resistance of the front stage. The audition feels like the sound field is pushed back to widen, the level is clear, the treble is round, and the after rhythm is long. The merchant attached some resistors of unknown brand in the meantime. The capacitor of the motorcycle fuse is not soldered with fever solder according to the introduction of Guangzhou enthusiasts. As a Chinese who wears a suit and treads sports shoes, it must be called like a German. The vicinity of the channel balance knob and the panel sound B-point resistor and capacitor are also replaced with supplements.
The diameter of the output stage of the original amplifier is small, and the lengths of the left and right channels are different. Replace them with silver-plated wires. The reference sound signals are routed on the circuit board to make the total length of the left and right channel signal channels tend to be consistent and simple shielding is performed. 4066 and other switches have to be kept because they cannot find replacements. The lotus socket also wants to be replaced with a single one, but it is not easy to replace, and it also affects the convenience of later motorcycle and maintenance. Just wipe it with a cotton swab dipped in alcohol.
Instruction Manual
1. Features
Clock display, 10 sets of adjustable timed power control, randomized power control, manual switch and optional DST setup.
2. First time charging
This Timer contains a rechargeable battery. It is normal that the new/old model runs out of battery if it wasn`t being charged for a long period of time. In this case, the screen will not turn on.
To charge : simply plug the timer to a power outlet. The charging time should take at least 15 minutes.
If the screen doesn`t light up or displays garbled characters, simply reboot the system by pressing the [RESET" button.
3. Set clock
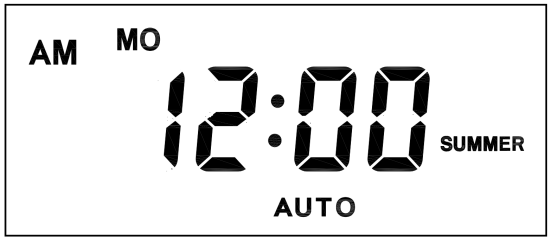
Hold [CLOCK" button and [WEEK" button to adjust week.
Hold [CLOCK" button and [HOUR" button to adjust hour.
Hold [CLOCK" button and [MINUTE" button to adjust minute.
Hold [CLOCK" button and [TIMER" button to select 12 hour/24 hour display.
Hold [CLOCK" button and [ON/AUTO/OFF" button to enable/disable DST (daylight-saving-time).
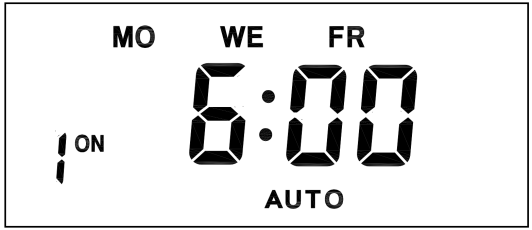
4. Set timer
Press [TIMER" button, select and set timer. Setting rotation : 1on, 1off, 2on, 2off, ...... , 10on, 10off.
Press [HOUR" button to set hour for timer.
Press [MIN" button to set minute for timer.
Press [WEEK" button to set weekday for timer. Multiple weekdays can be selected. ex: if selected [MO", the timer will only apply on every Monday; if selected [ MO, WE, FR", the timer will apply on every Monday, Wednesday and Friday.
Press [RES/RCL" button to cancel the selected on or off timer. The screen will show "-- -- : -- --" , the timer is canceled.
Press [RES/RCL" button again to reactivate the timer.

When timers are set, press [CLOCK" to quit timer setting and return to clock.
5. Random function

Press [RANDOM" button to activate random function, press again to cancel function.
System only runs random function when [AUTO" is on.
Random function will automatically start the timer from 2 to 32 minutes after the setting.
ex : if timer 1on was set to 19:30 with the random function on, the timer will activate randomly between 19:33 to 20:03.
if timer 1off was set to 23:00 with the random function on, the timer will activate randomly between 23:02 to 23:32.
To avoid overlapping, make sure to leave a minimum of 31 minutes gap between different sets of timer.
6. Manual control
Displayed features:
ON : socket turns on.
OFF : socket turns off.
AUTO : socket turns on/off automatically via timer.
Manual ON setting
Press [ON/AUTO/OFF" button to switch from [AUTO" to [ON".
This mode allows socket of the device to power up. Power indicator will light up.
Manual OFF setting
Press [ON/AUTO/OFF" button to switch from [AUTO" to [OFF".
This mode turns socket of the device off. Power indicators will turn off.
7. Electrical parameters
Operating voltage : 230VAC
Battery : NiMh 1.2V
Power consumption : < 0.9W
Response time : 1 minute
Power output : 230VAC/16A/3680W
Q&A
Q: Why won`t my timer turn on?
A: It`s out of battery, you can charge the timer by plugging onto any power outlet. Charge the device for at least 15 minutes. Then press [RESET " button to reset the device.
Q: Can I set seconds of the timer?
A: No, the smallest time unit is minute.
Q: Does my timer keeps old settings without being plugged onto a power outlet?
A: Yes, the timer has an internal battery, it allows the timer to save settings without a power outlet.
Q: Is the battery rechargeable?
A: Yes, the battery is rechargeable. We recommend to charge it for 4 hours so the battery is fully charged.
Q: Does the timer needs internet connection?
A: The timer does not need internet.
Q: Does the screen have back light function?
A: It doesn`t support back light.
digital timer, digital timer socket, electronic timer socket, timer socket
NINGBO COWELL ELECTRONICS & TECHNOLOGY CO., LTD , https://www.cowellsocket.com